
As Michael {my beloved} and I enter our 21st month of wedded blissfulness, I’m beyond thankful for God’s hand of provision. Among the top-listers on my gratitude list is that of our beautiful home! Michael was a bachelor when he purchased our cozy 3br/2ba abode in Franklin, TN. (Well done, babe!) As a woman who married in her late 30’s, it was just icing on the cake to marry a man who came with a house! ;) When we got married, Michael gave me carte blanche to do whatever I wanted to make this house our home. What a man!
One of my first projects was to adorn our master suite with a headboard. I searched high and low (read: @pinterest addict fanatic lover), and determined that wood was the best compromise for us so as not to overwhelm my husband with too much femininity in every room. Just right! Here’s how it all came together:
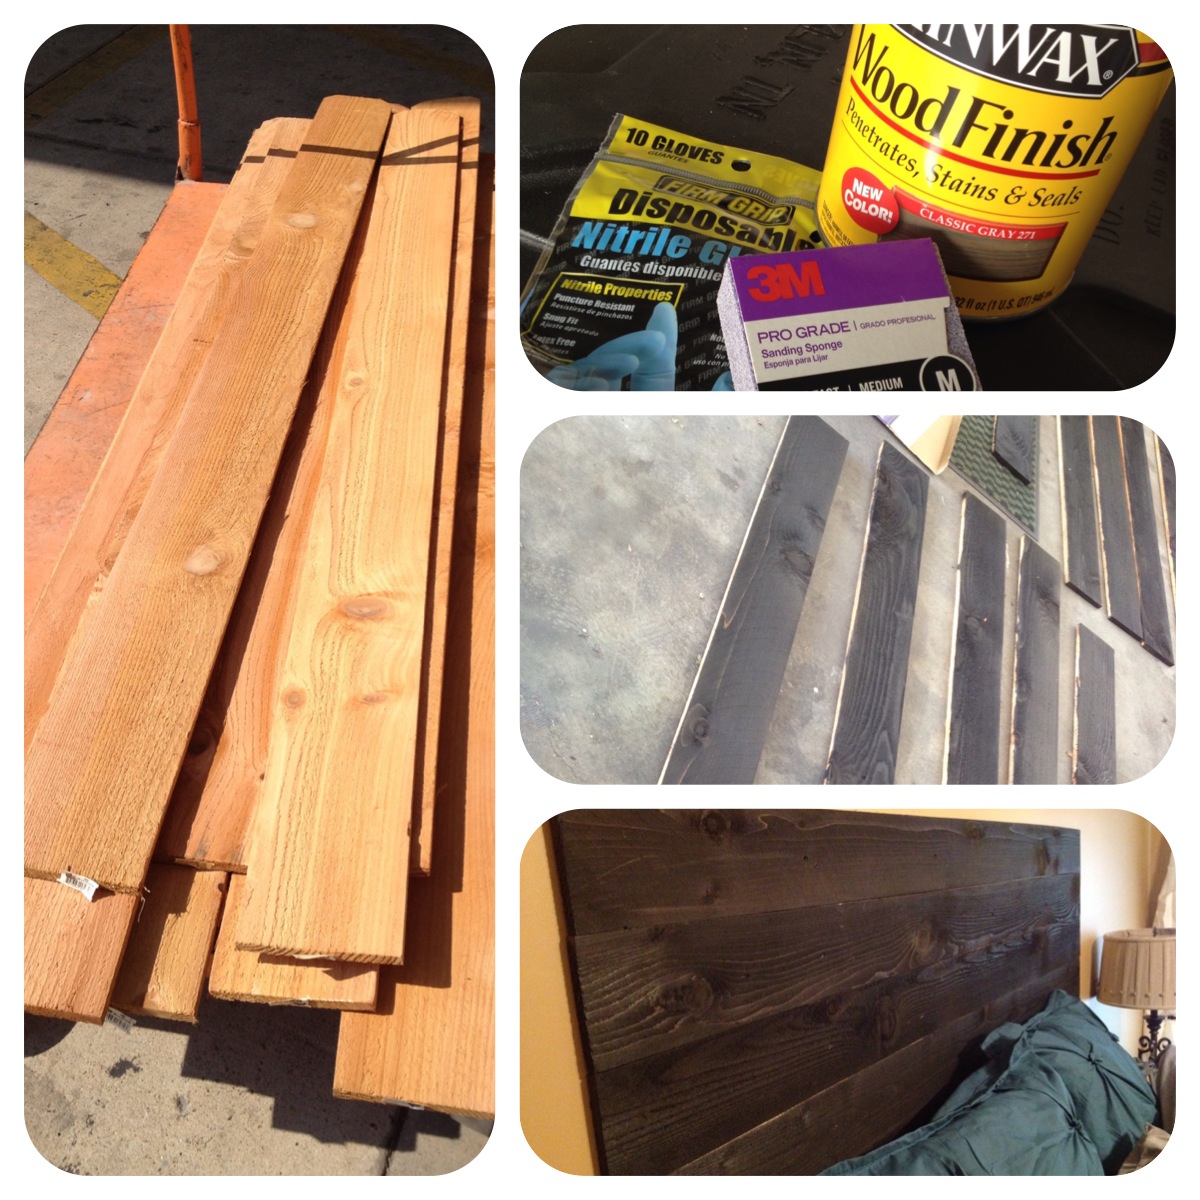
1. I headed to Home Depot with my dad, Steve, and his burly truck to pick up 10 cedar planks (make sure you get the ones that are NOT weather treated since they will be inside and you don’t want those chemicals in your house, let alone at the head of your bed!)

2. Grab some wood stain (I chose black, but you can do whatever suits your room), a sand block or sand paper, a paint brush and some good latex gloves. You’ll want to sand the wood to whatever smoothness you prefer. I wanted mine to stay a bit more on the rustic side, so I didn’t smooth it out completely – just got rid of some of the larger splinter pieces.
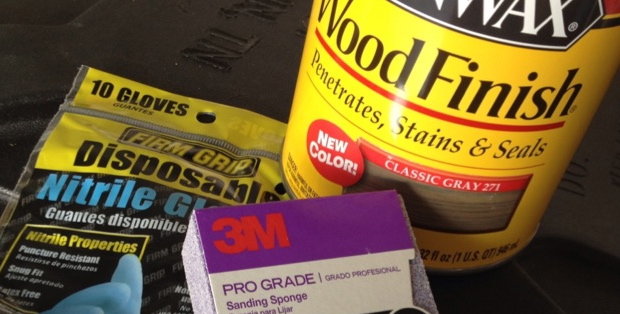
3. Next, slap on the gloves (since the paint brush will spray a bit in this process), take the paint brush dipped in the stain and saturate each cedar plank on both sides and the ends.
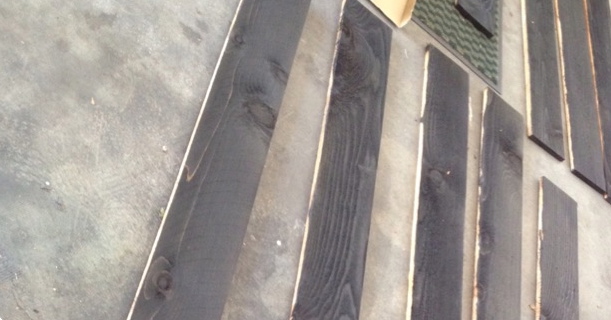
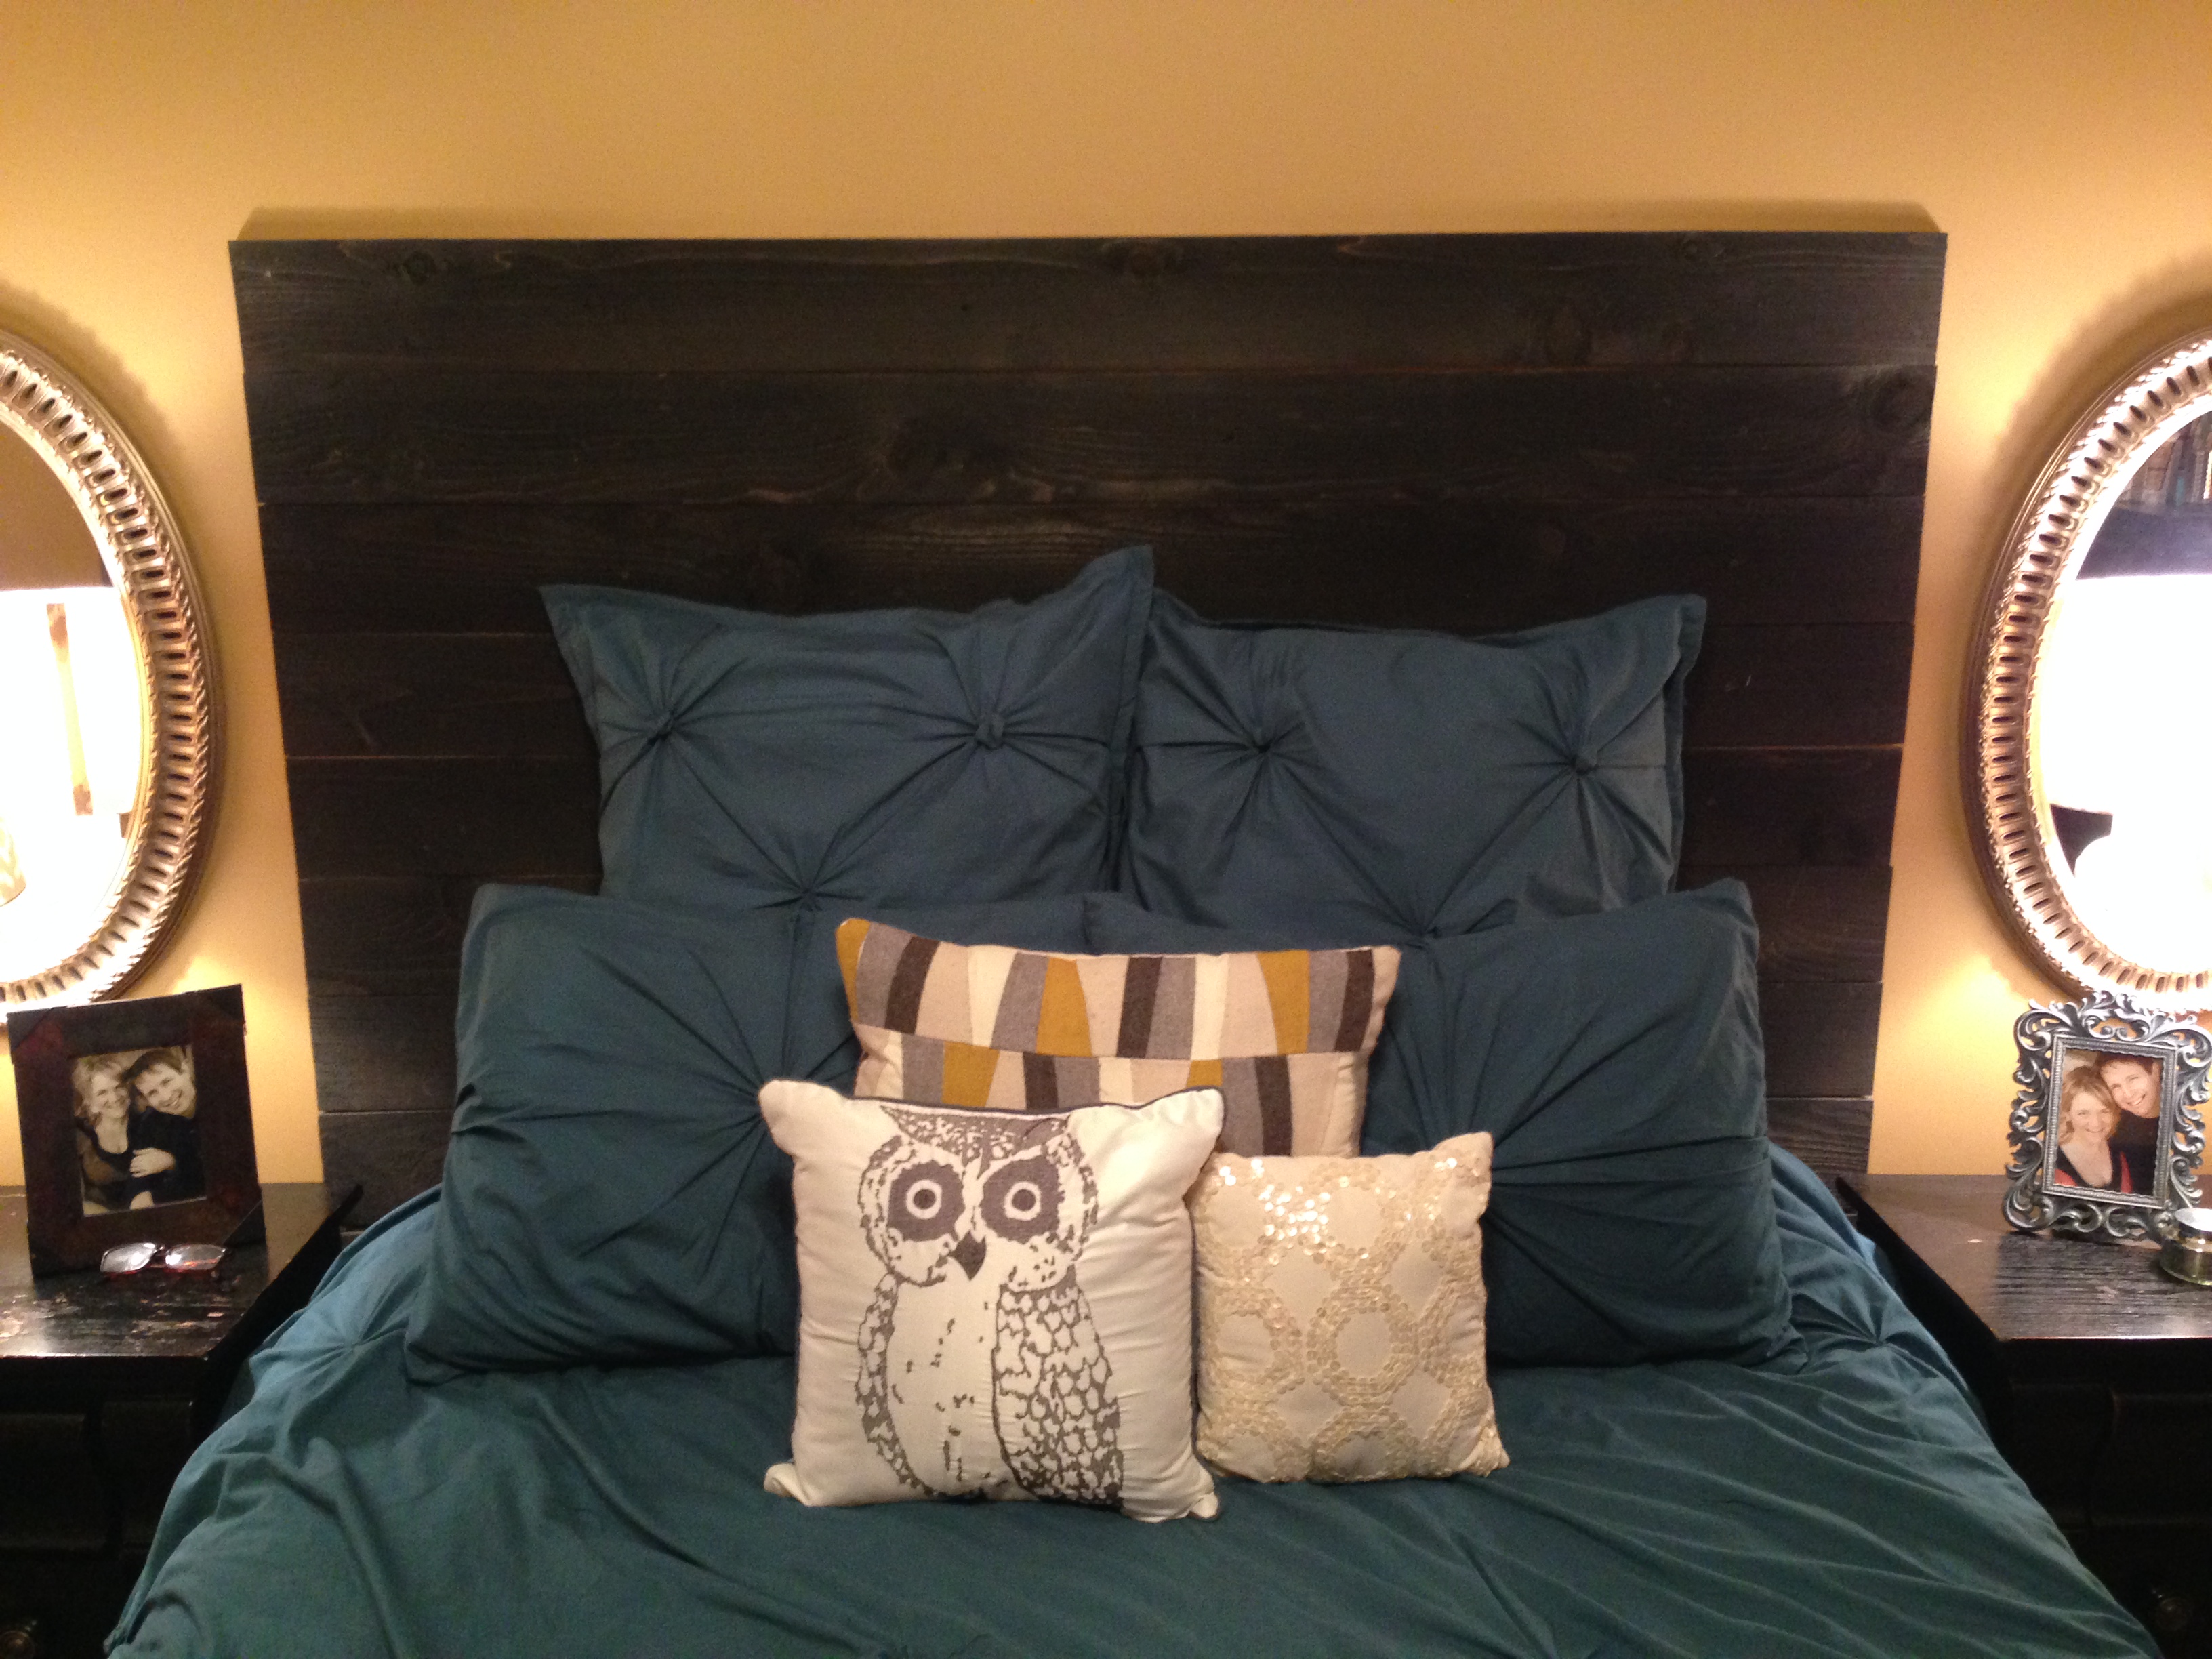
4. Let them dry thoroughly and air out since the stain is a bit pungent (I let mine sit in my garage for 2 days with a fan). Once they’re all dry, screw each plank into the wall as desired starting with the bottom plank with screws on both the left and right sides of the plank. I started with the bottom plank about 1 foot below the top of the mattress. It’s helpful to have a special helper assist you with placement of the planks since you’ll need help holding them in place as you screw in each side. The finished product… I love it!

When You open Your hand, You satisfy the hunger and thirst of every living thing. | Psalms 145:16

Hey there! What a great idea. I’m hoping to do this for my hubby for a valentines day suprise! Question(s) how many and what was the length of each plank? Also what did you use to hang them on the wall?
Hi Amanda! That’s a great idea for Valentine’s! The planks are 6 ft. long by 5.5 in. wide and I used 9 planks (you can determine if you want the headboard taller or shorter by using more or less planks, of course). I used molly bolts and screws to hang them (2 screws for each plank – one on the left side, one on the right). Another friend is doing the same, but she is connecting the planks to one another with hinges on the back and then just using molly bolts/screws on the top plank. Hope that helps! Let me know if you have any other questions, and happy headboarding! ;)
Thank you so much for the reply! I’m going to get the supplies tomorrow and was curious to know how you hung them up! thanks:)